
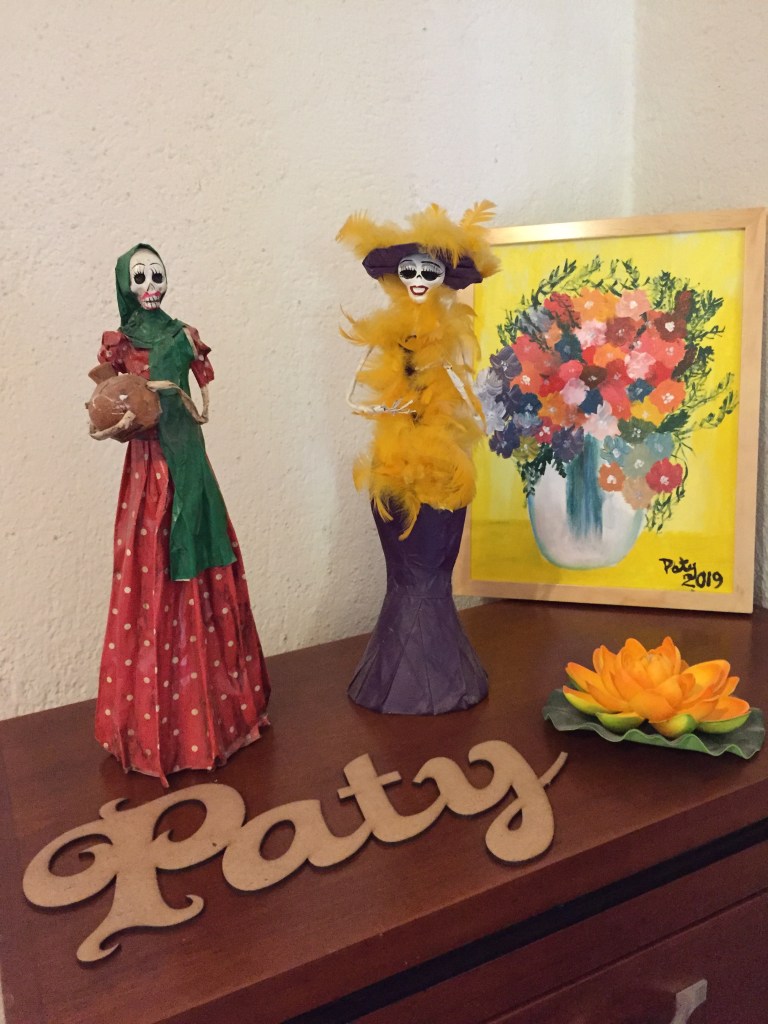
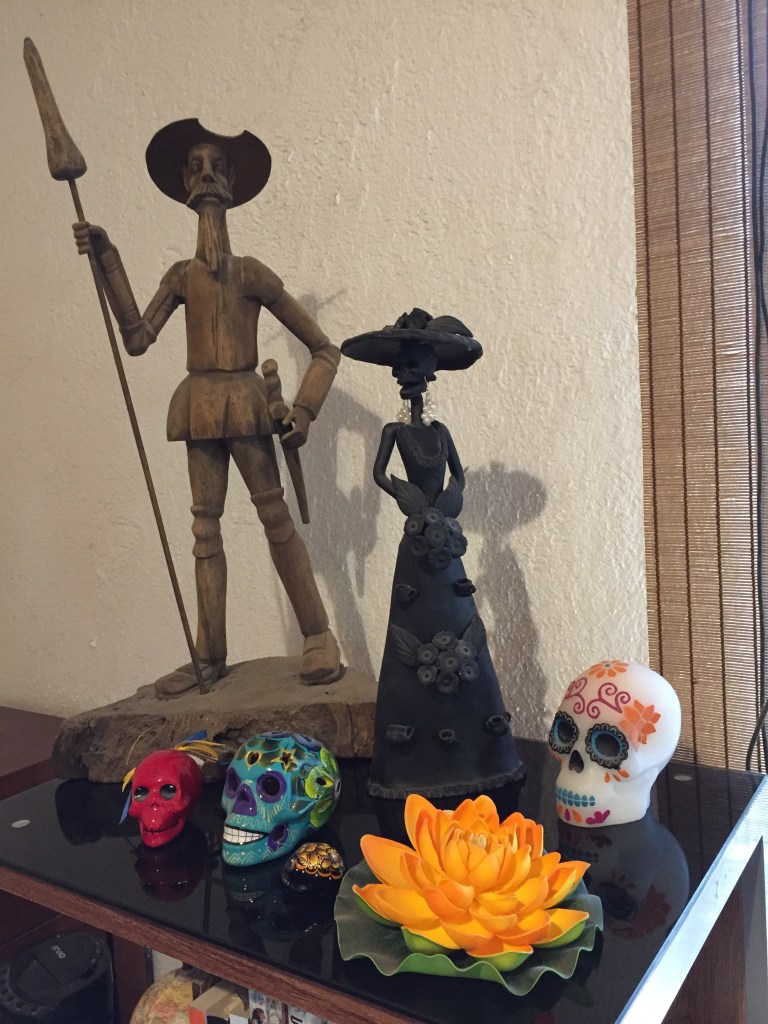
Living in Mexico, I have fallen in love with the art of the Calaveras and Catrinas, and have several in my home of wax, ceramic, papier-maché and clay. So when my friend Anilu told me about a class in which we could learn to make them, I signed up right away.
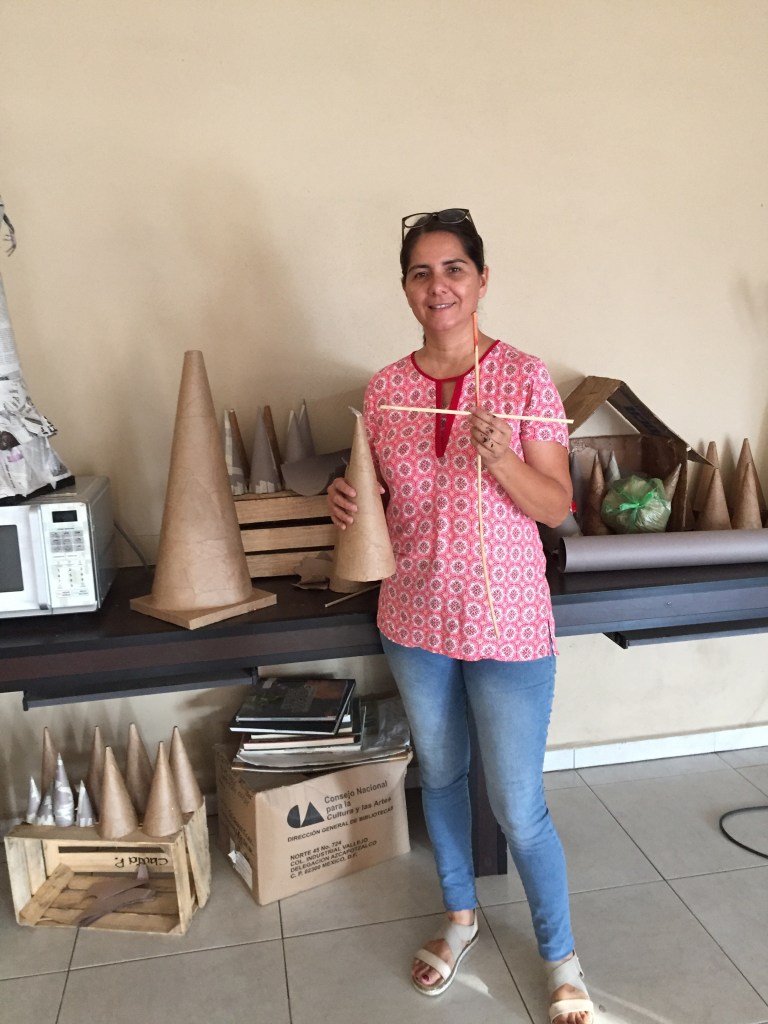
The Catrinas we would be making in class were of papier-maché and were much larger than expected, but would still be a welcome addition to my collection.
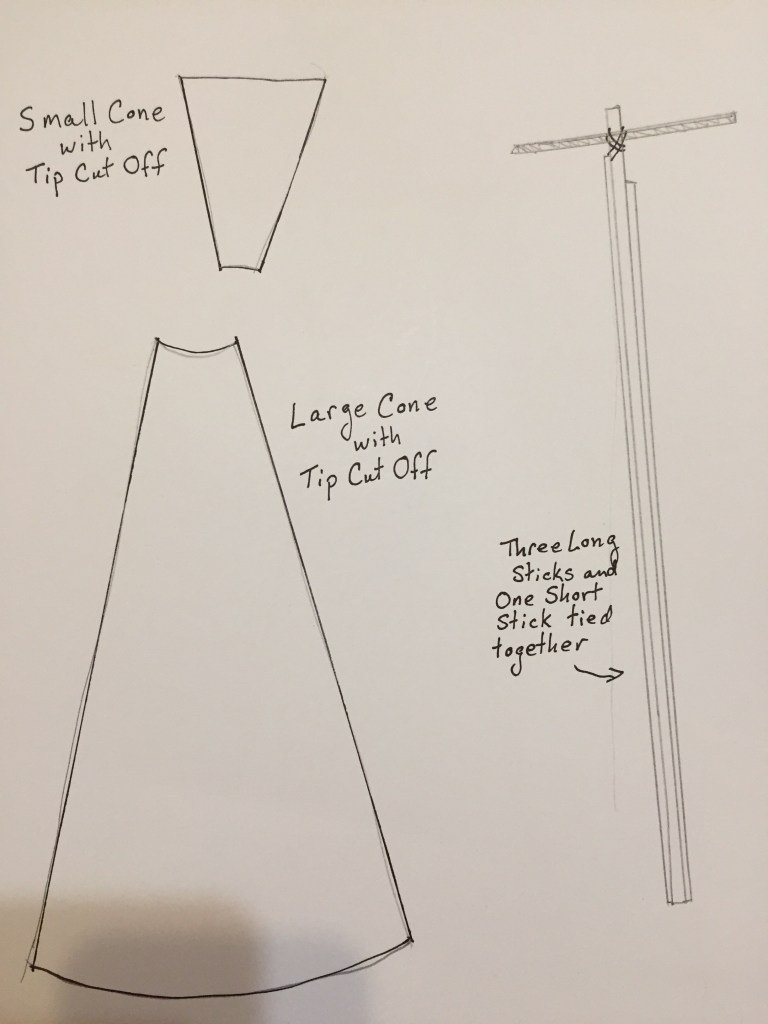
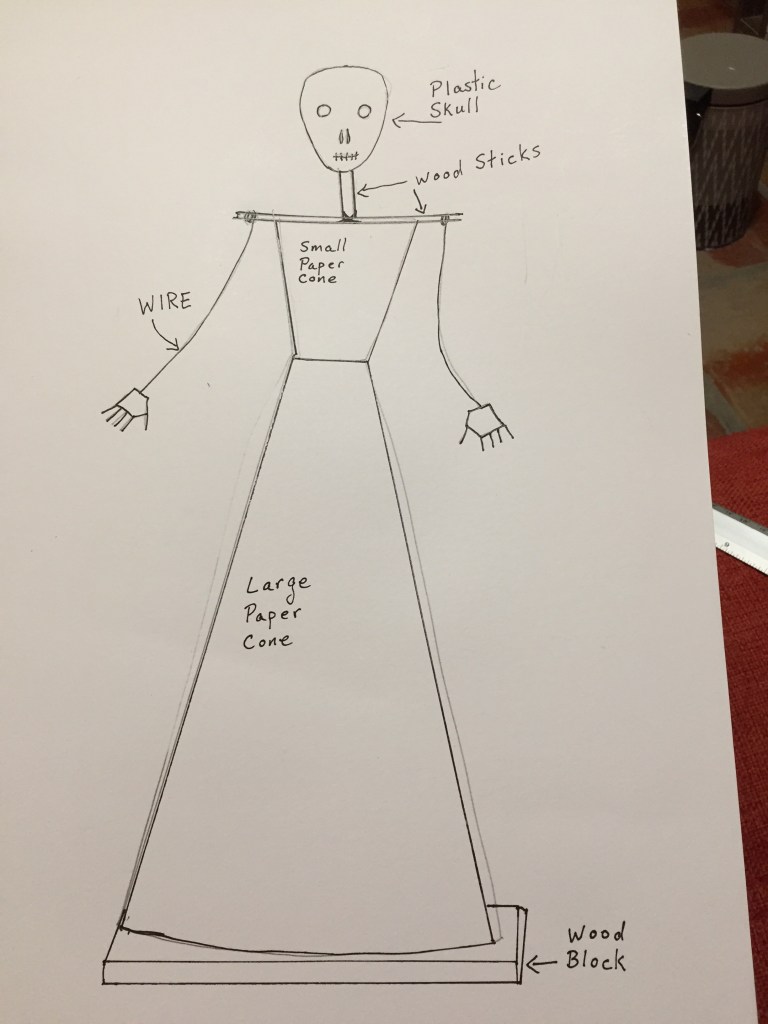
First, we began with construction paper cones with the tips cut off. A small cone is then inserted into a large cone and four sticks tied together in the shape of a cross were then inserted into the cones.
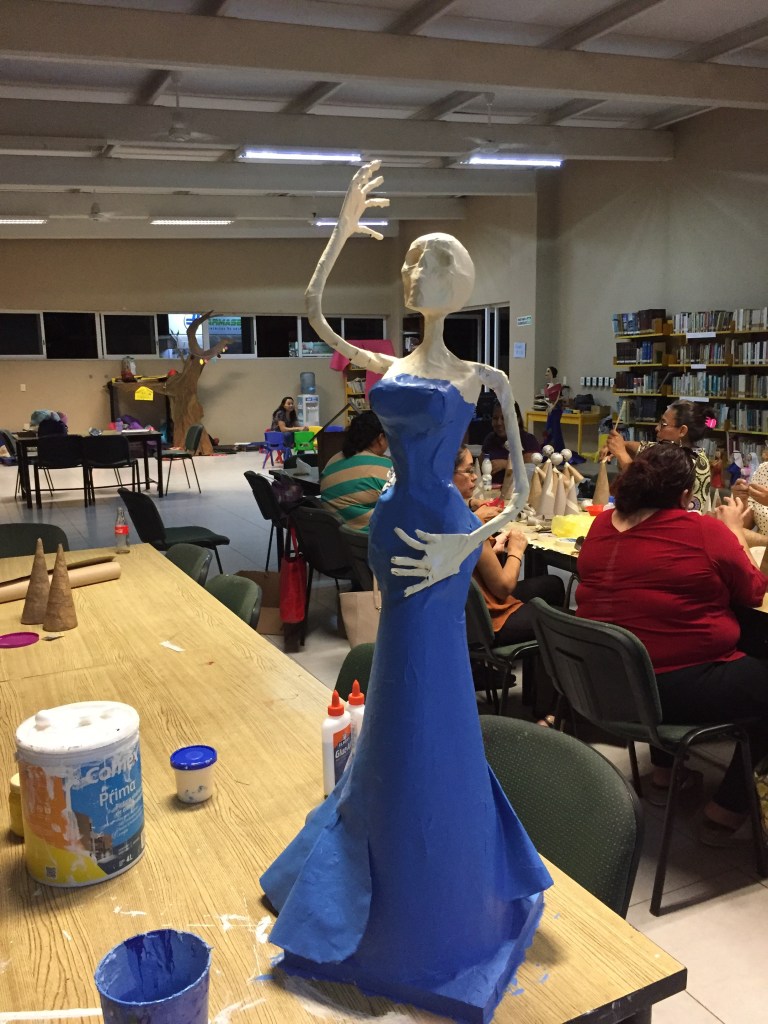
The cones were placed on a square block of wood and with masking tape, the pieces were secured to each other. A plastic skull was placed on the “neck” and wires attached to the “shoulders.” “Hands” were then attached to the wrists of the wires which were the arms of La Catrina.
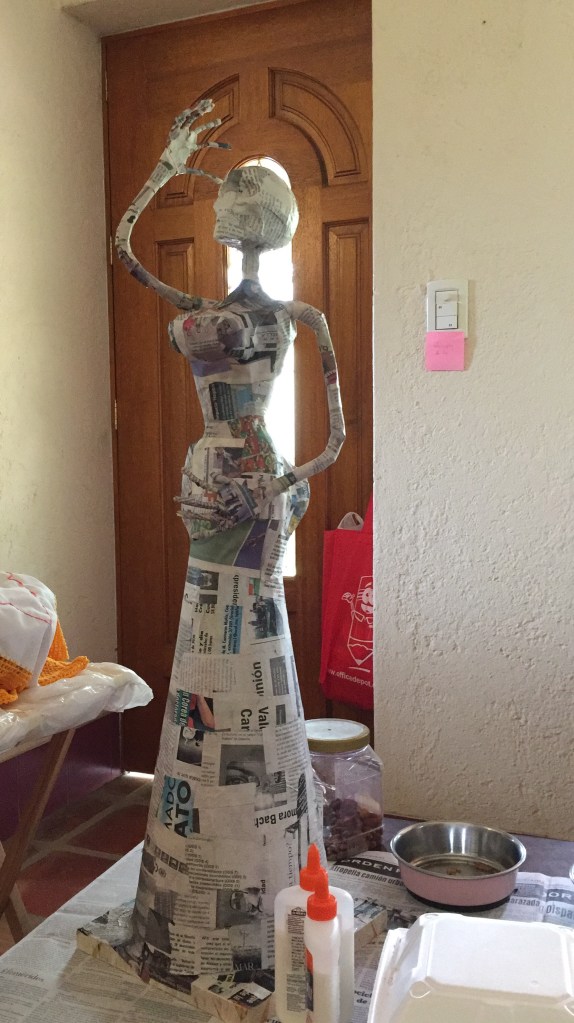
Then comes the messy part – making the papier-maché. After the first session, I realized bringing an apron was a good idea. We mixed a solution of glue and water, then cut up newspapers, then coated each piece of newspaper with the glue and covered the Catrina.
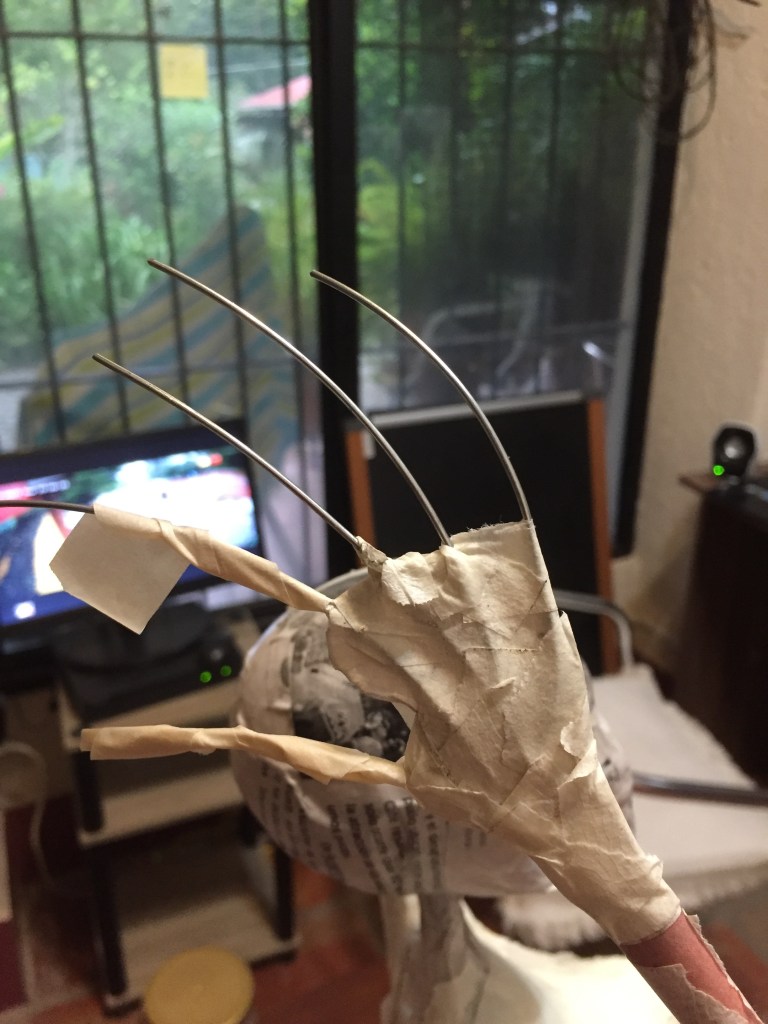
Because the wires for the arms are so thin, we needed to wrap several layers of folded newspaper around them, and tape them in place with masking tape before applying the papier-maché, and do the same with the “fingers.”
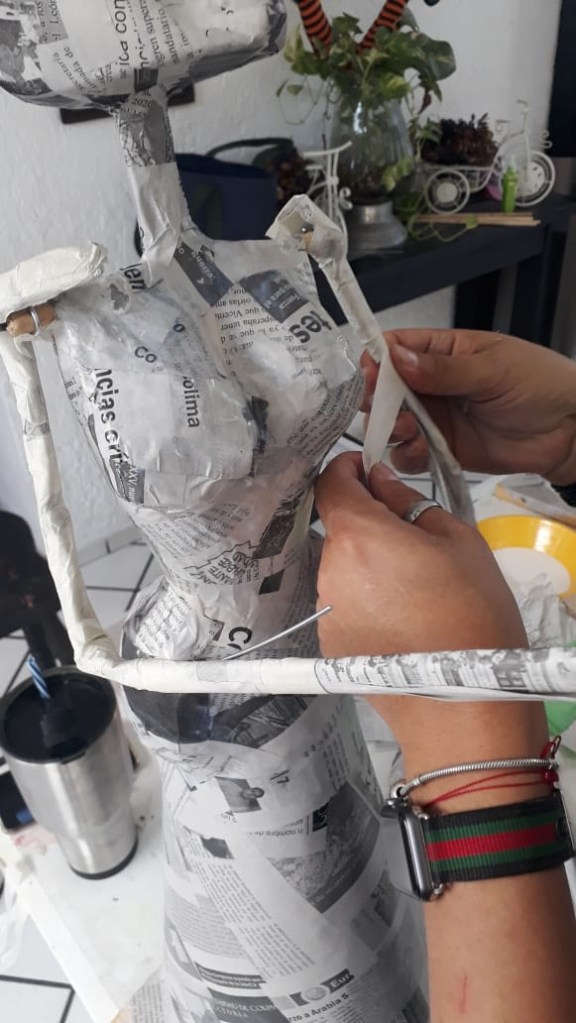

Everything was covered with paper and glue, including the skull. Because of time constraints, we dried the whole thing with hair dryers, and then applied a second coat of paper and glue. This was a bit difficult, since everything looked the same; it was not like applying a coat of paint in one color and then a second coat in a different color.
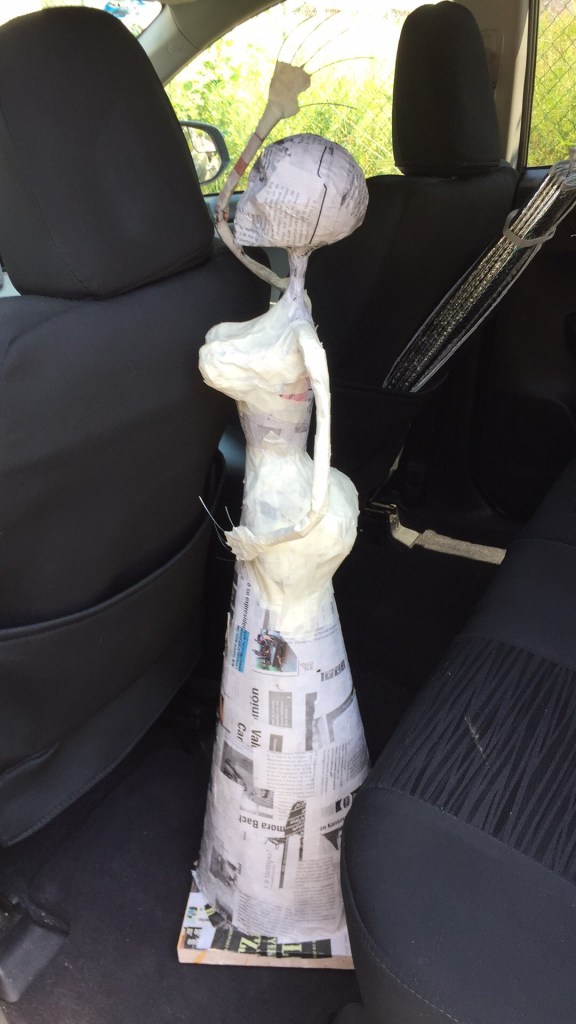
I was not able to finish the two coats in one class, and so brought my Catrina home to do the second coat, which I allowed to air-dry. I was a bit disheartened regarding placing two coats of paper, but Yazmín informed us that some of her creations require six coats of paper.
Oh, I almost forgot – we also created her chest and bum. Squishing two pieces of paper into balls, we then taped them to her chest. It took three larger balls of squished paper to create the bum – one on each hip and one larger one behind. Tape it all in place and cover with papier-maché.
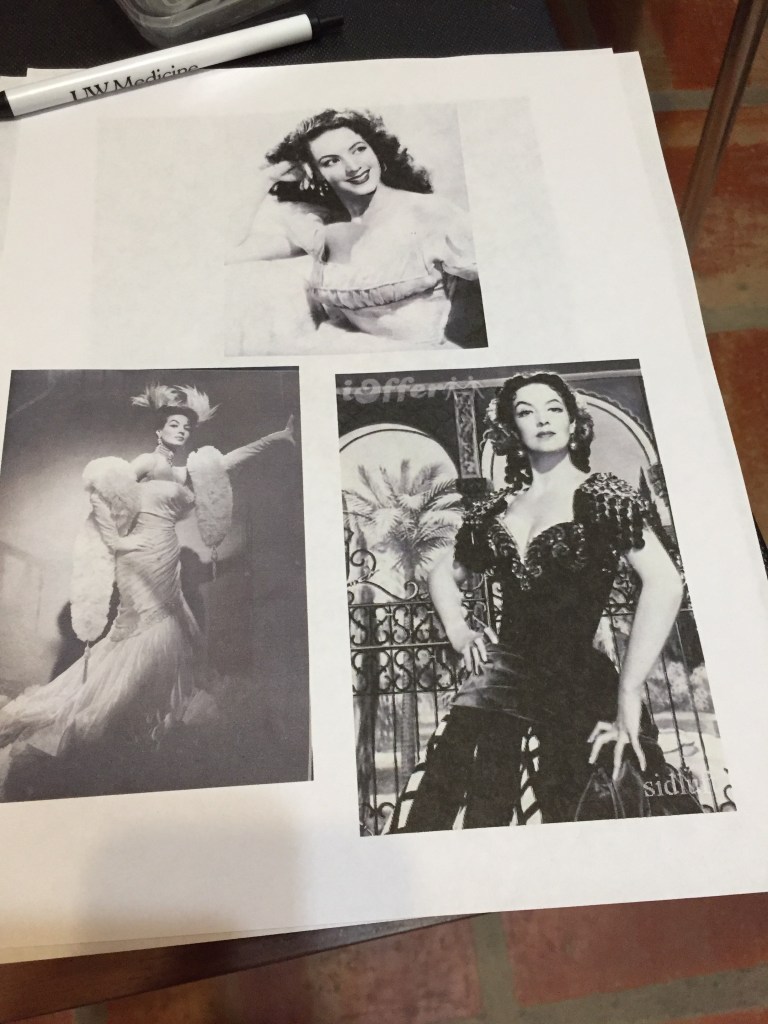
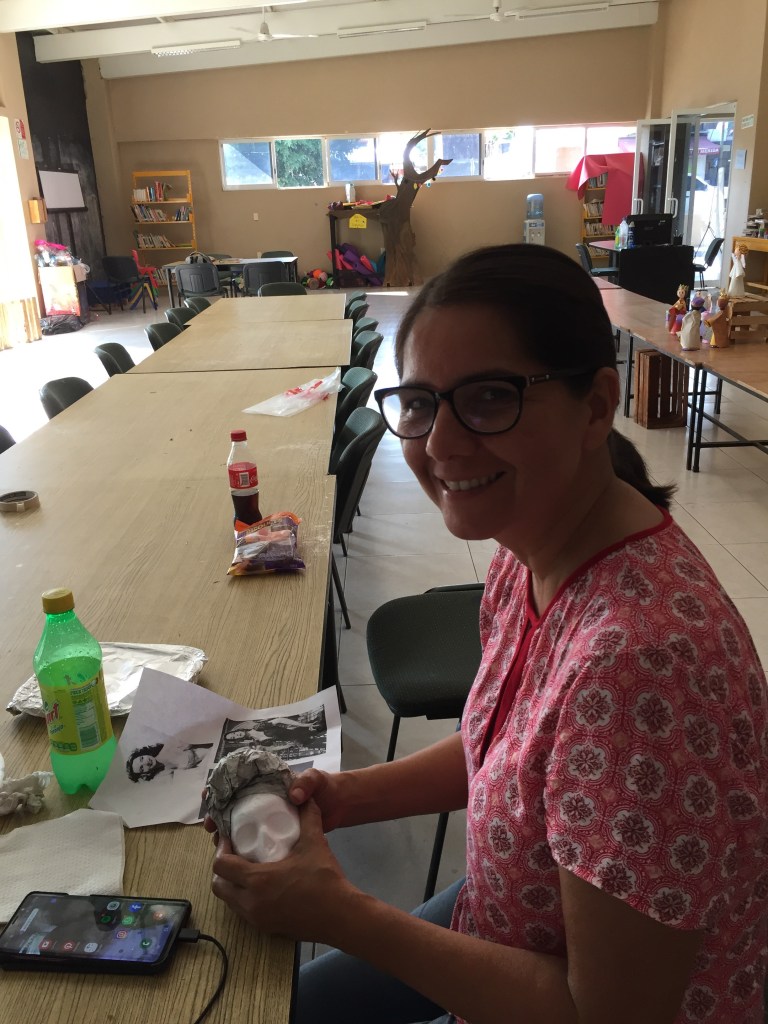
When that was done, some of the other students commented that her voluptuous body reminded them of the famous Mexican singer Maria Felix. I had not decided what type of female my Catrina would be before that point – an indigenous woman, an artist, etc. – but hearing those comments, I decided that Maria Felix she would be. And so, when I got home, I looked up photos of her to use as a reference.
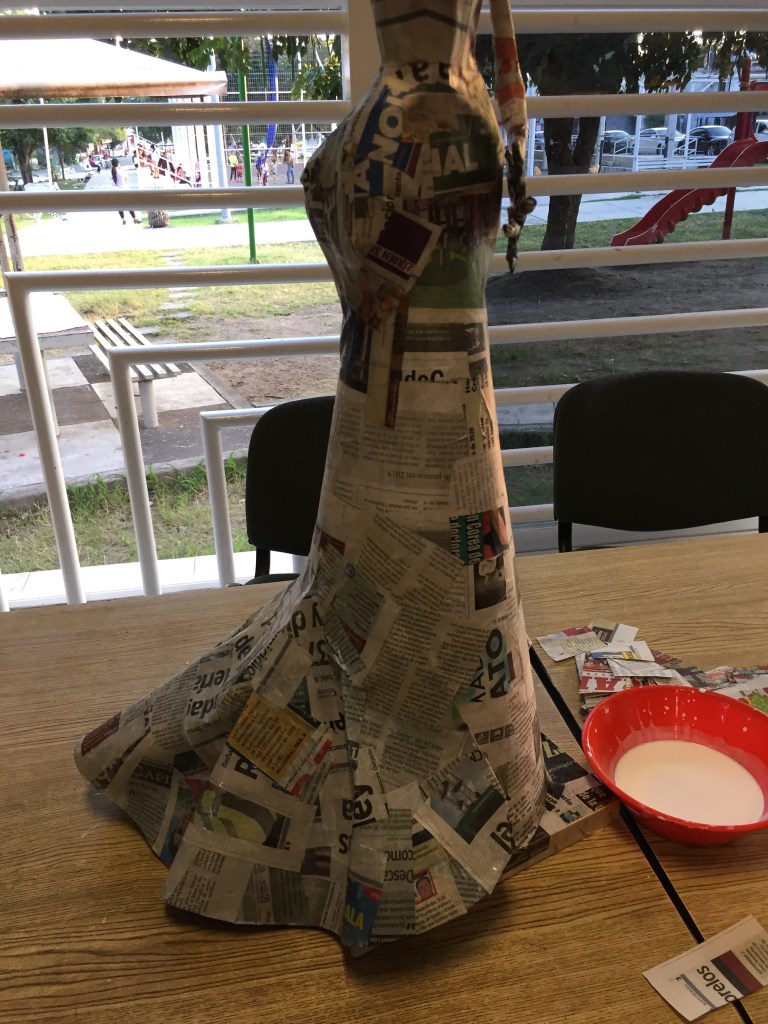
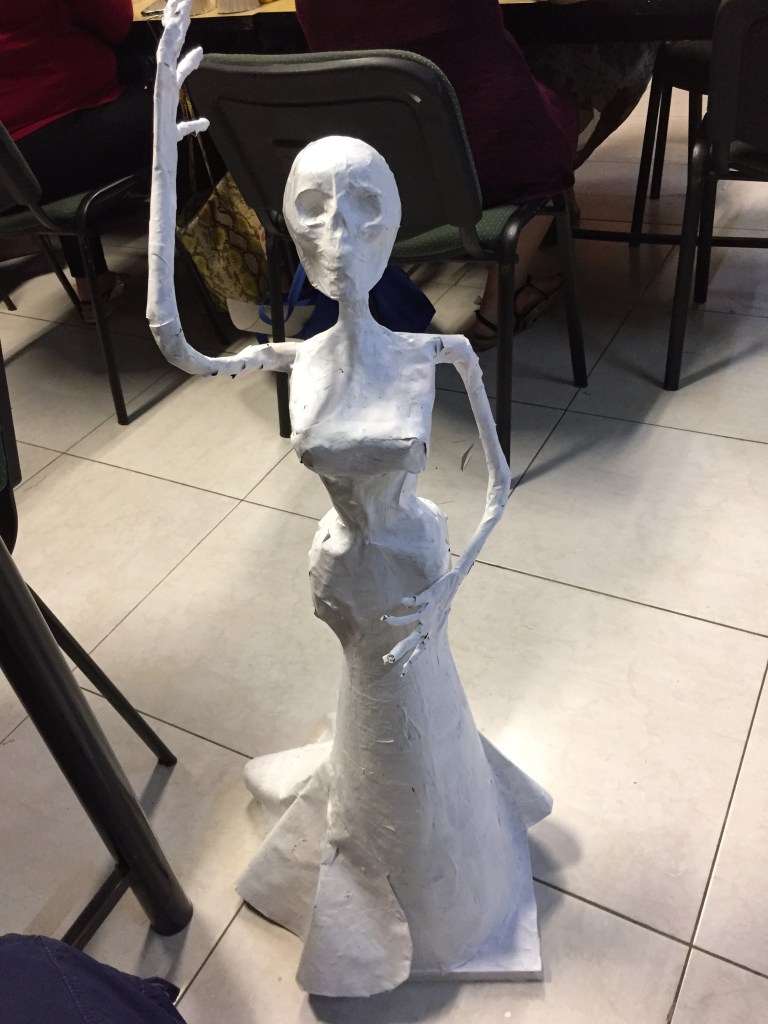
Then it was time to transport her to the next class for her transformation. First, create the hem of her skirt. For this we needed more construction paper cut into a semi-circle, tape it to her “skirt” and cover with papier-maché. Dry it, then coat the entire Catrina with a base coat of white paint. Now she was a blank canvas which we could transform into Maria.
First I painted her skin, and then decided on a blue dress, so the dress was painted next. The wooden base was painted the same color as the dress. Once again, she was dried with a hair dryer and re-painted.

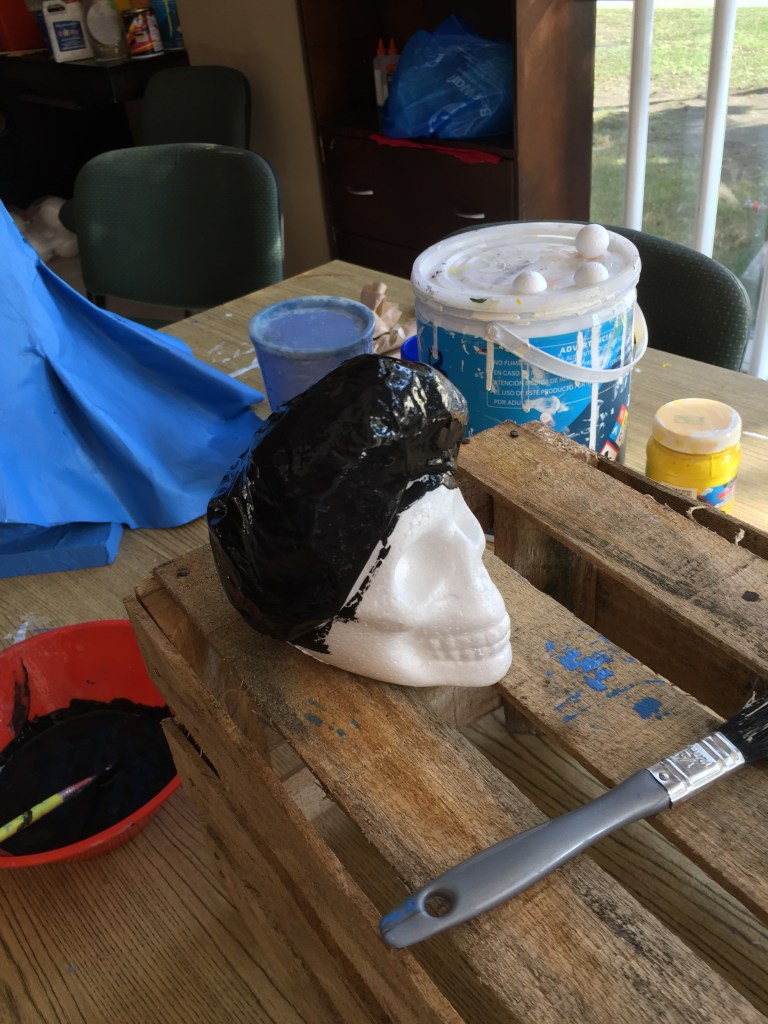
Then it was time to paint her face – with a fine brush to paint her eye sockets, her nostrils and her teeth. For the hair, Newspaper was crumpled up and placed on a separate skull to be papier-machéd, then painted black. Then glue was placed inside and the hair was placed on the skull of Catrina.

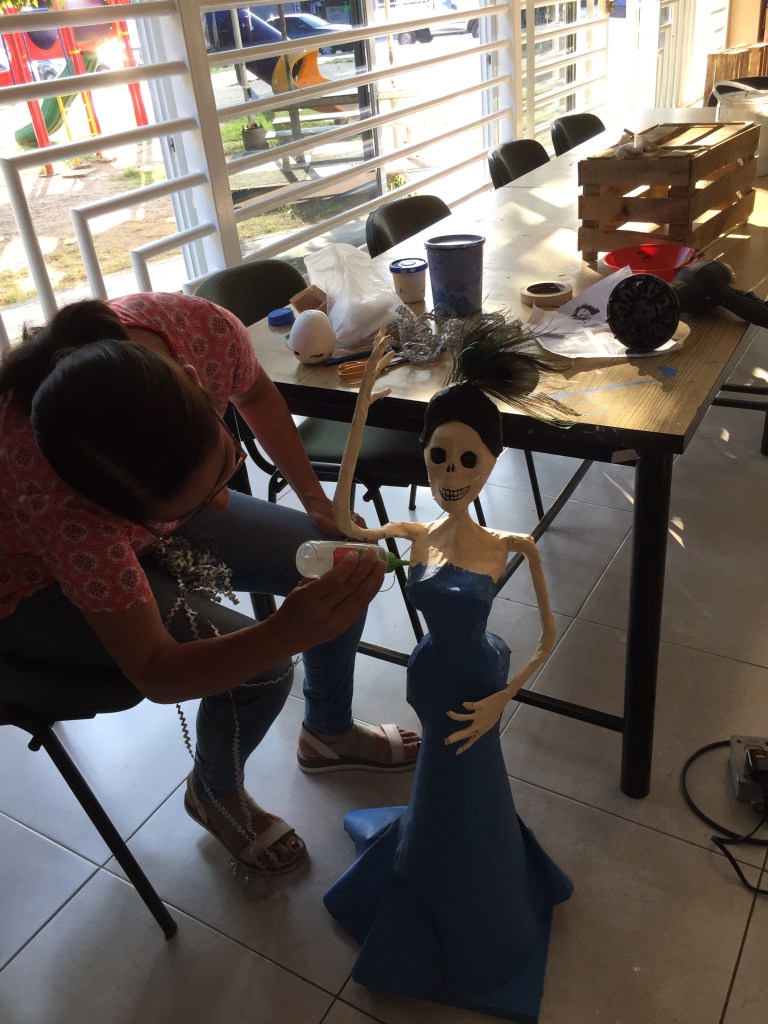
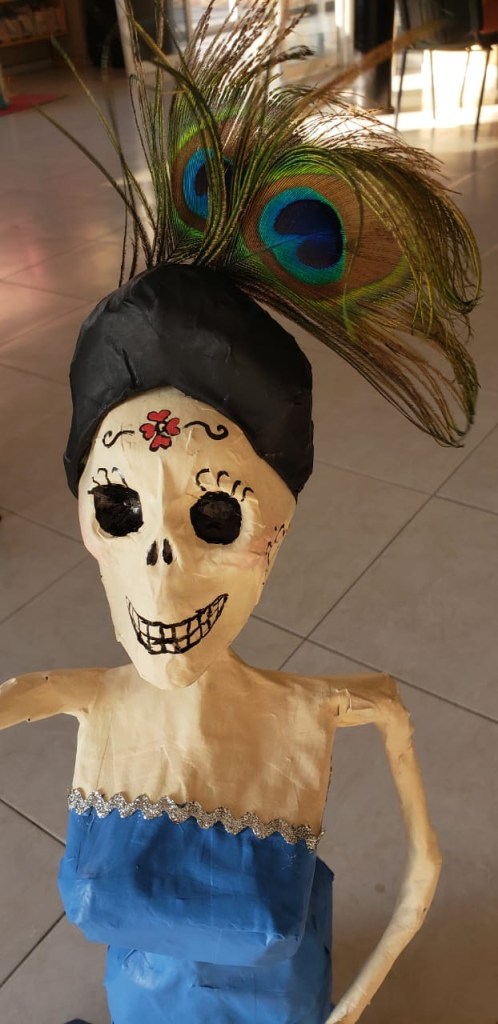
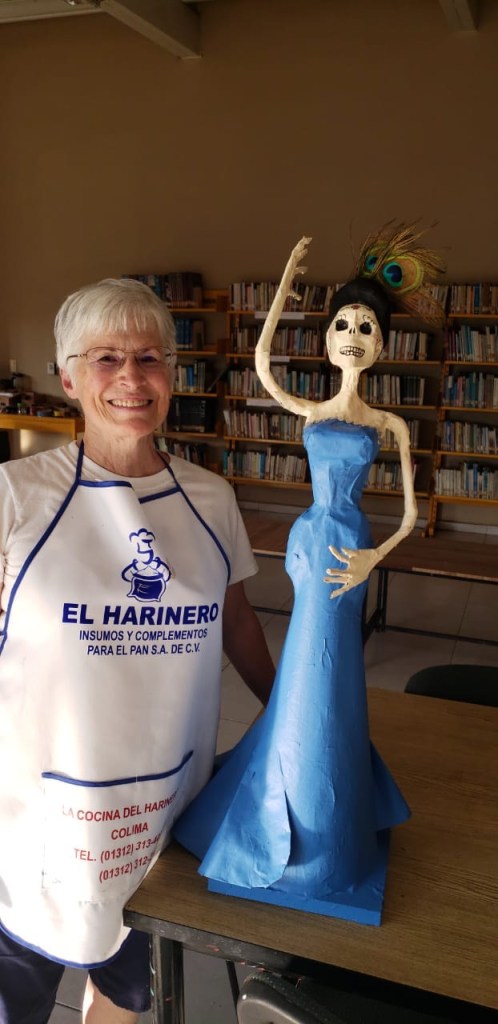
After that, the finishing touches of makeup were painted on her face and trim on the dress. Finally, I decided that I wanted feathers in her hair, so two peacock feathers were glued to the back of her hair.
The whole process took me three days, but it was a very nice learning experience. My Catrina is not as elegant as many of the finished ones I have seen in shops, and I know where the imperfections are, so I can now see why many of the Catrinas for sale have the price tags that they do.
And so, until next time, have a wonderful day wherever you are……
Adios amigos !


Excellent! I love it! The process, and the final result are great! Thank you .
LikeLike
I’m happy you enjoyed it. Thank you.
LikeLike
Lovely artworks, Pat! Thanks for sharing!
******************* Susan Hill Huizilacate #6 Cofradia de Suchitlan, CP 28460 Colima Tel in Mexico: +52 312-395-4146
In USA: 1701 Novato Blvd #302 Novato, CA 94947 Cel in USA: 415 755-8619 *********************
>
LikeLike